Customer Prompts
In some organisations, there may be a requirement to capture specific information when completing a transaction on a point of sale terminal. This can be achieved using customer prompts. For example, prompts can be used to collect a flight number at an airport or a villa number in a large resort.
Before payment is taken, the prompt will automatically appear on screen. However, if the prompt has already been completed such as via a prompt button added to the theme as part of an alternative ordering journey it will not be shown again.
Customer Prompts Topics
Adding Prompts
Follow these steps to add a prompt:
-
Click Add
-
Enter the Prompt Text
Zonal recommends ensuring that POS operators understand what is expected of them when this prompt text appears -
Enter the Maximum Entry Length
This value defines the maximum number of characters that can be entered when the prompt is displayed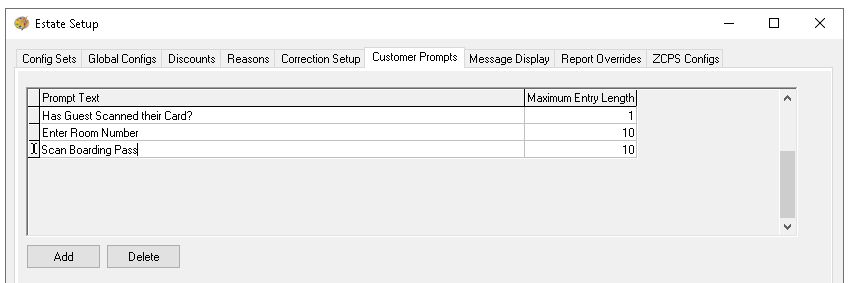
Deleting Prompts
Follow these steps to delete prompts:
-
Select an existing prompt, click Delete
The prompt will be removed from the list
Assigning Prompts to Config Sets
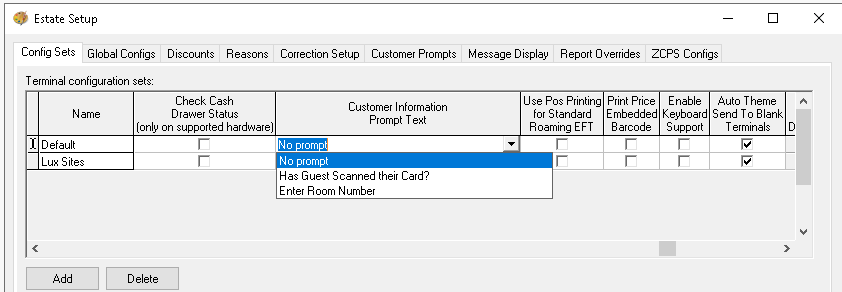
Once a prompt has been created, it must be assigned to the relevant terminals where it is required. This is done through the assignment within the config set.
Follow these steps to assign the prompt to the config set:
-
Select the required config set and scroll across to locate the Customer Information Prompt Text
-
Choose the required prompt from the drop down
-
Update each config set as required
Theme Settings
Once the prompt has been assigned to the config set the point of sale terminal will automatically prompt the POS operator before payment to enter the reference. There is an optional button that can be added to the theme panel / shared panel designs which enable the prompt the to be completed ahead of payment.
Follow these steps to add the prompt button:
-
Select the required Theme Panel Design or Shared Panel where the buttons should be added
-
From the button picker Functions | Ordering add the Enter Pay Time Ref button